We hope you enjoy this content. Just so you know, this website may collect a share of sales or other payment from any links, products, or videos on this page.
The content on this site is informational only, and is not intended to be professional advice. Please consult your attorney, doctor, or financial advisor before making any decisions.
Canning tomatoes at home is a great way to enjoy fresh, delicious tomatoes all year long. Whether you grew your own tomatoes or found a great deal at the farmer’s market, learning how to can tomatoes is both fun and rewarding.
In this easy-to-follow guide, we’ll walk you through the entire process of canning tomatoes safely and correctly. No fancy tools or advanced cooking skills are needed—just basic kitchen equipment, fresh tomatoes, and a little patience.
What is Canning?

Canning is a method of preserving food by sealing it in airtight containers. It helps prevent spoilage and keeps food safe to eat for months, sometimes even years. When done correctly, canning locks in flavor, nutrients, and freshness.
There are two main methods of canning:
- Water Bath Canning – Ideal for high-acid foods like tomatoes.
- Pressure Canning – Best for low-acid foods like meats and some vegetables.
Since tomatoes are naturally acidic, we’ll be using the water bath canning method in this guide.
What You Need to Can Tomatoes
Before you begin, gather the following supplies and ingredients:
Ingredients:
- Fresh ripe tomatoes (about 2½ to 3½ lbs per quart jar)
- Bottled lemon juice or citric acid (for safety)
- Salt (optional, for flavor)
Supplies:
- Canning jars with lids and bands (pint or quart size)
- Large pot or water bath canner with a rack
- Jar lifter or tongs
- Ladle and funnel
- Large mixing bowls
- Slotted spoon
- Clean kitchen towels
- Cutting board and knife
- Ice water bath (for peeling tomatoes)
Step-by-Step: How to Can Tomatoes
Step 1: Pick the Best Tomatoes

Start with the freshest tomatoes you can find. Choose tomatoes that are:
- Firm but fully ripe
- Free of bruises, cracks, or mold
- Bright red (or the proper color for the variety you are using)
Avoid overripe or damaged tomatoes. These can spoil faster and may contain harmful bacteria that affect the safety and flavor of your canned goods.
Best Tomato Varieties for Canning:
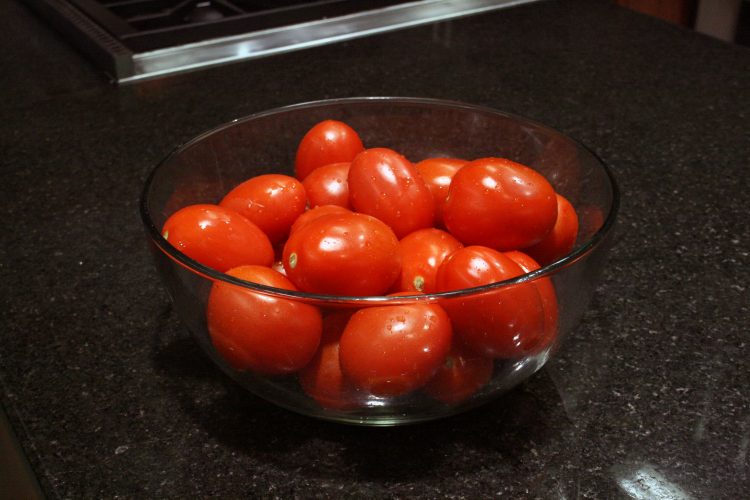
- Roma (plum) tomatoes – Dense and low in moisture, perfect for sauces and paste.
- San Marzano – Sweet, rich flavor, ideal for Italian dishes.
- Amish Paste – Meaty texture with few seeds, great for canning whole or chopped.
- Celebrity – Juicy and flavorful, good for both slicing and preserving.
You can also mix tomato types, but keep in mind that juicier tomatoes may create more liquid and require more cooking down.
Step 2: Wash and Prepare the Tomatoes
Wash each tomato under cool running water to remove any dirt or residue. Be sure to:
- Remove stems and any leaves
- Discard any tomatoes with visible signs of spoilage
- Place cleaned tomatoes in a large mixing bowl or colander
Tip: Washing your produce properly is important, even if you plan to peel it later. It helps avoid contamination during the canning process.
Step 3: Blanch and Peel
Peeling the tomatoes makes for a better texture and appearance in your final product.
How to Blanch and Peel:
- Fill a large pot with water and bring it to a rolling boil.
- Fill a large bowl with ice water for cooling the tomatoes after blanching.
- Carefully lower a few tomatoes at a time into the boiling water using a slotted spoon.
- Let them sit in the hot water for 30 to 60 seconds, or until the skins start to crack.
- Quickly transfer the tomatoes into the ice water bath to stop the cooking process.
- Once cooled, peel off the skins using your hands or a paring knife. The skins should come off easily.
Tip: Don’t overcrowd the pot. Work in small batches for better control and more consistent results.
Step 4: Cut and Remove Cores
After peeling, cut the tomatoes in halves or quarters, depending on the size and how you plan to use them.
- Remove the core (the hard part where the stem was attached).
- Trim off any green or unripe spots.
- You can leave the seeds in or remove them, based on personal preference. Some people find seedless canned tomatoes better for sauces and smoother recipes.
Place the prepared tomatoes into a clean bowl and set aside while you prepare your jars.
Step 5: Sterilize Jars
Properly sterilizing your jars is crucial for safe canning.
How to Sterilize Jars:
- Place the empty jars in a large pot or water bath canner.
- Fill with water until the jars are fully submerged.
- Bring the water to a boil and let the jars boil for 10 minutes.
- Keep the jars warm until you are ready to fill them. Warm jars reduce the risk of breakage when hot tomatoes are added.
Alternative: You can place clean jars in a 200°F (93°C) oven for 10–15 minutes to keep them warm.
Tip: Don’t forget to wash your lids and bands with hot, soapy water. You don’t need to boil the lids, but they should be clean and dry before use.
Step 6: Add Lemon Juice or Citric Acid
This step is not optional. Even though tomatoes are naturally acidic, their acidity can vary depending on the variety, ripeness, or growing conditions.
Add to Each Jar:
- Quart jars: 2 tablespoons of bottled lemon juice OR ½ teaspoon of citric acid
- Pint jars: 1 tablespoon of bottled lemon juice OR ¼ teaspoon of citric acid
Important Notes:
- Use bottled lemon juice, not fresh. Bottled has a standardized acid level.
- Add the acid directly into the jar before adding the tomatoes.
- If desired, add salt for flavor (½ tsp for pint jars, 1 tsp for quart jars), but it’s optional.
Step 7: Pack the Tomatoes
You have two main options when packing tomatoes into jars:
1. Raw Pack (Cold Pack):
- Fill jars with uncooked, peeled tomato pieces.
- Press tomatoes down gently to release juice and reduce air pockets.
- Leave ½ inch of headspace at the top.
2. Hot Pack:
- Place peeled, cut tomatoes into a pot and simmer over medium heat for 5 minutes.
- Spoon hot tomatoes and their juice into jars.
- This method allows more tomatoes per jar and helps prevent floating.
Either method is fine, but hot packing tends to give better results in terms of texture and jar fill.
Step 8: Remove Air Bubbles
Trapped air can lead to spoilage, so don’t skip this step.
- Slide a non-metal utensil (such as a bubble remover or plastic knife) along the inside edge of the jar.
- Gently press tomatoes to release any trapped air.
- Adjust the headspace if needed by adding more tomatoes or juice.
Tip: Avoid using metal utensils, as they can damage the jar or disrupt the seal.
Step 9: Wipe and Seal
- Use a clean, damp paper towel or cloth to wipe the rim of each jar. Any leftover food can interfere with sealing.
- Place the lid centered on the jar.
- Screw on the band just until it’s fingertip-tight. Don’t over-tighten, as air needs to escape during the canning process.
Step 10: Process in Water Bath Canner
This is where the canning magic happens!
How to Process:
- Place the filled jars on the rack inside the canner.
- Ensure the jars are fully submerged under at least 1 inch of water.
- Bring the water to a full rolling boil.
- Start your timer only once the water is boiling.
Processing Times:
- Pint jars: 35 minutes
- Quart jars: 45 minutes
If you live at a high altitude, you’ll need to increase the processing time (see the altitude chart in the main article).
Tip: Keep the water at a steady boil the entire time for proper preservation.
Step 11: Cool and Store
Once the processing time is complete:
- Turn off the heat and let jars sit in the water for 5 minutes.
- Carefully lift the jars out using a jar lifter and place them on a towel or wooden board to avoid thermal shock.
- Let the jars cool for 12–24 hours undisturbed.
- As they cool, you’ll likely hear a “pop” sound—this means the jar has sealed!
How to Check the Seal:
- After 24 hours, press the center of the lid. It should not pop back.
- If it does, the seal didn’t take—store that jar in the fridge and use it within a few days.
Label the sealed jars with the date and contents, and store them in a cool, dark place such as a pantry, cupboard, or cellar.
Properly sealed jars can last 12 to 18 months or longer when stored correctly.
Adjusting Water Bath Processing Times by Altitude
When canning tomatoes at higher altitudes, it’s important to adjust your processing time to ensure the contents reach a safe temperature. Water boils at a lower temperature the higher you go above sea level, which means your jars may not heat enough to kill harmful bacteria unless extra time is added. If you live above 1,000 feet in elevation, you’ll need to increase your water bath processing time accordingly. The higher your altitude, the more time you should add.
Add the following time to your processing:
- 1,001–3,000 feet: Add 5 minutes
- 3,001–6,000 feet: Add 10 minutes
- 6,001–8,000 feet: Add 15 minutes
- 8,001–10,000 feet: Add 20 minutes
Always consult a reliable source or your local extension office if you’re unsure of your exact elevation or processing time.
Tips for Canning Success
- Always use bottled lemon juice instead of fresh lemon juice, as it has a consistent acidity level.
- Don’t reuse lids. Use new ones for each batch to ensure a proper seal.
- Don’t skip sterilizing your jars. It’s a key step to prevent bacteria.
- Use a timer. Boiling times matter for safety, especially at high altitudes.
- Label everything. Include the contents and date canned.
How Long Do Canned Tomatoes Last?
Home-canned tomatoes can last up to 12–18 months if stored in a cool, dry, and dark place. Always check for signs of spoilage (like mold, foul smell, or broken seals) before use.
How to Use Your Canned Tomatoes
Canned tomatoes are super versatile. You can use them in:
- Pasta sauces
- Soups and stews
- Chili
- Casseroles
- Pizza sauce
- Shakshuka
Simply open a jar, heat, and enjoy!
Common Canning Mistakes to Avoid
- Not adding enough acid
- Not processing long enough
- Using unsterilized jars
- Overtightening the lids
- Reusing old canning lids
- Not adjusting for altitude
Final Thoughts
Learning how to can tomatoes is a simple, budget-friendly skill that pays off all year long. Whether you’re stocking up for winter or avoiding waste from your garden, this time-tested method helps you make the most of your tomatoes.
With a little care and attention to safety, you’ll be enjoying the taste of summer even in the middle of winter.
Happy canning!
